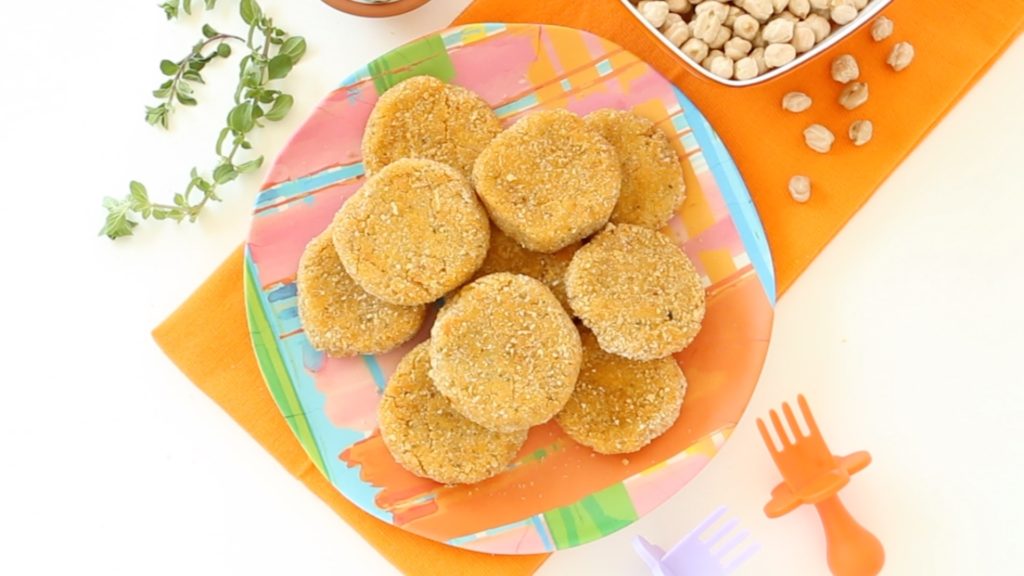
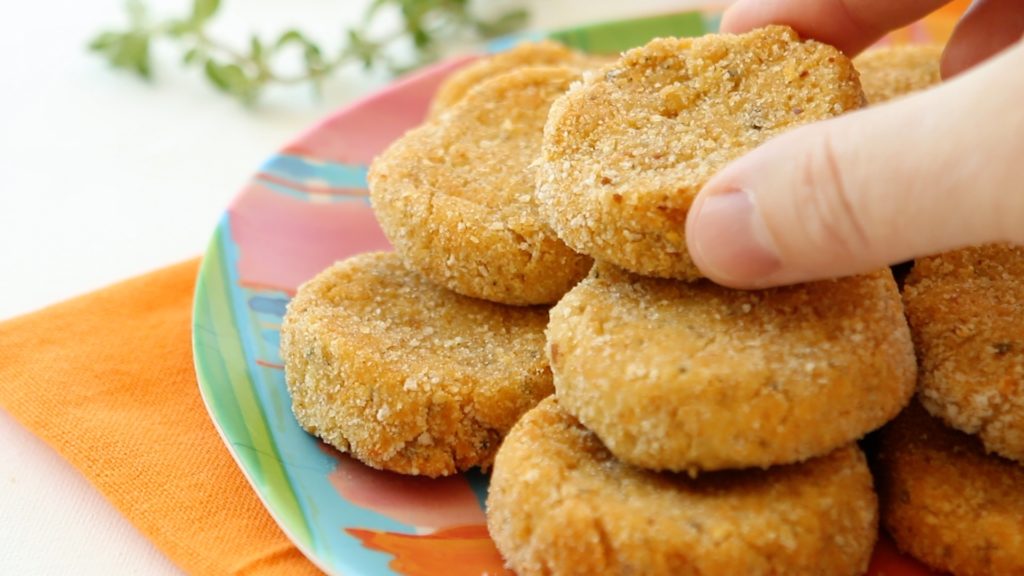
Nuggets, Tots, Croquettes, Sticks…they are all super kid friendly shapes. Easy to handle, fun, bite size. Perfect for toddlers. They all have a crispy and crunchy outside with a creamy and tasty inside. I already shared trusted chicken and fish nuggets recipes with you, so today I wanted to offer a meatless alternative.
The chickpea nuggets are a lovely high protein meal idea. Creamy, cheesy and tasty. A great combination for toddlers (and for adults).
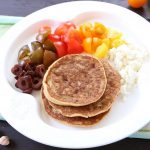
The chickpea nuggets can be an easy lunch idea for your toddler and for yourself. I created a buddha bowl salad for myself with lettuce, tomatoes, cucumbers, two nuggets, a scoop of brown rice and some edamame on top and served nuggets with a side of cucumbers and tomatoes for the kids (edamame as a snack in a small cup on the side). I love when I can satisfy little ones and adults with the same recipe 🙂

Chickpeas are a great legume to offer to your kids. Highly nutritious, chickpeas are high in iron, folate, zinc and vitamin B6. If your goal is to increase your kids’ iron intake, you should consider adding more chickpea recipes in the menu. Don’t forget also to add foods high in vitamin C that helps the body absorb the iron. Simply serving a bunch of berries or few slices of tangerines at the end of the meal will do the job!
Ready to bake our Golden Chickpea Nuggets?
HOW TO MAKE CHICKPEA NUGGETS FROM SCRATCH
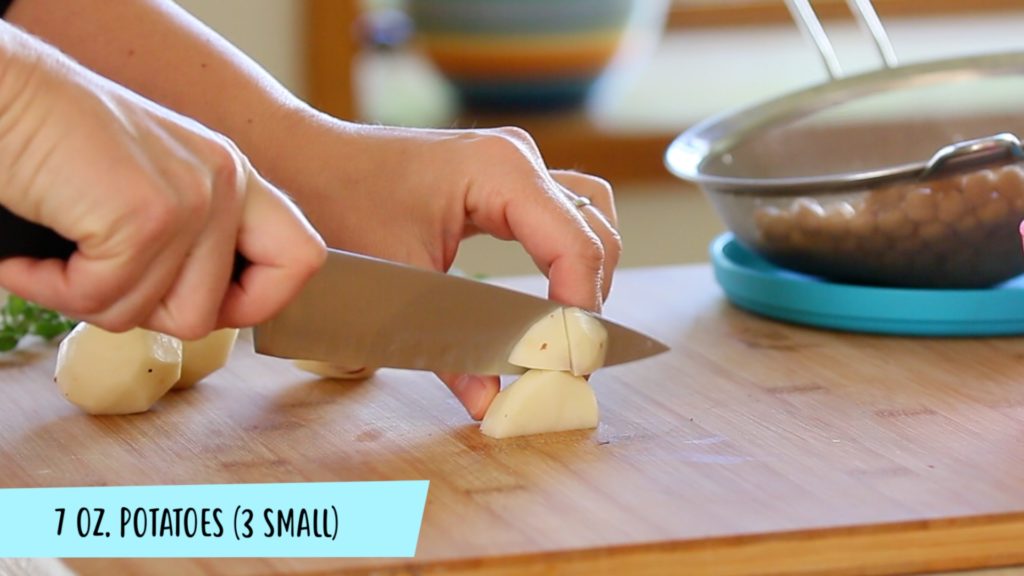
Let’s start peeling and chopping the potatoes in small pieces. Boil them for 15-20 min up until tender. Drain and let them cool down few minutes.
Drain the chickpeas and rinse them. Set aside.
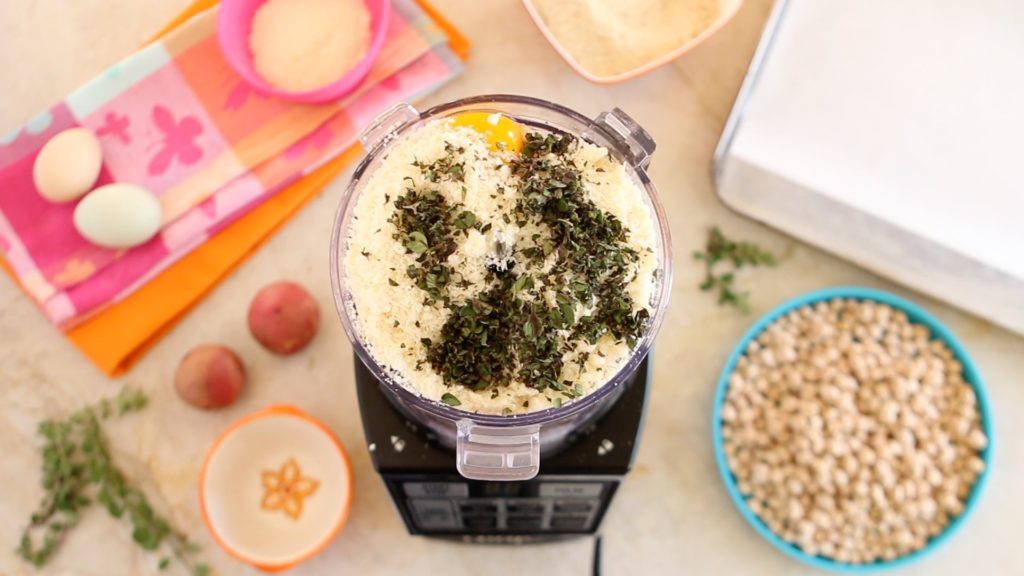
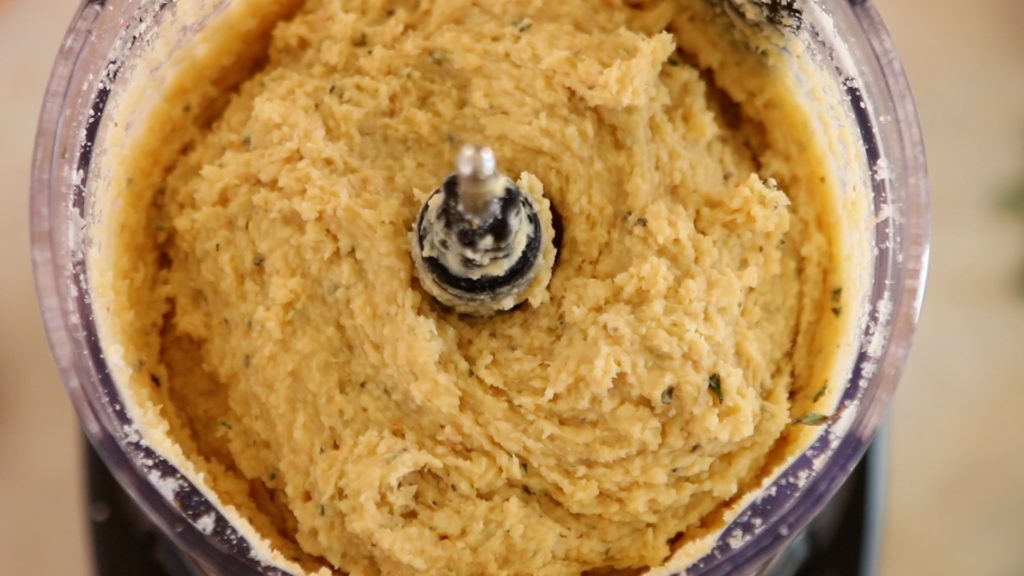
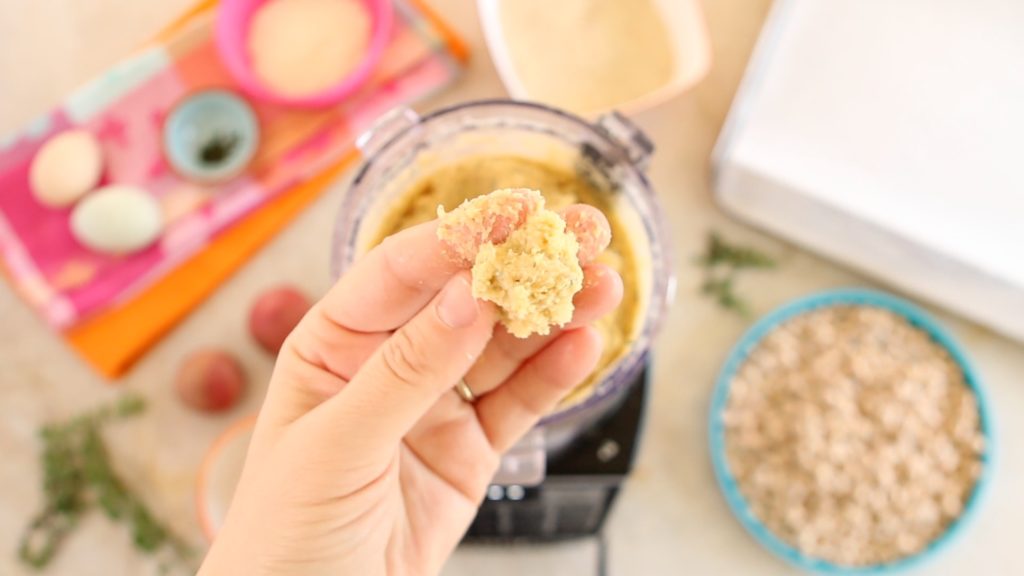
In a food processor add all the ingredients: chickpeas, boiled potatoes, bread ( I used a mini burger bun that I had left in the pantry, but you can use a slice of toast bread of your choice), breadcrumbs, egg, Parmesan cheese, thyme. Adjust with a pinch of salt and blend up until obtaining a thick smooth paste.
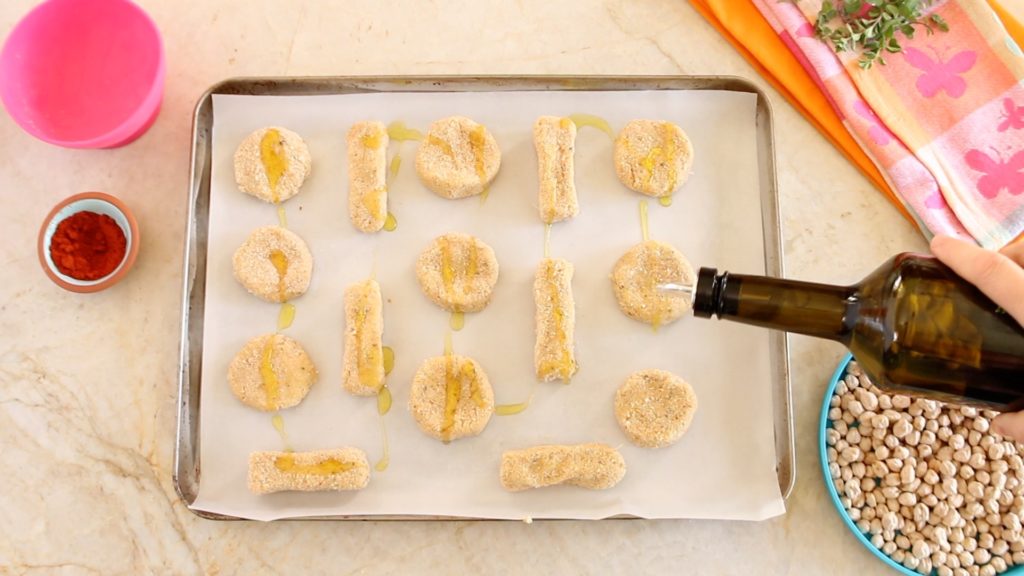
In a large bowl mix the breadcrumbs with the Parmesan Cheese and the sweet paprika. Place one tablespoon of chickpeas mix in the breadcrumbs mix and coat it all around. With your hands shape it into a round nugget or an oval tot. Place the nugget on a baking sheet lined with parchment paper. Keep coating, shaping, lining to use all the chickpeas mix.
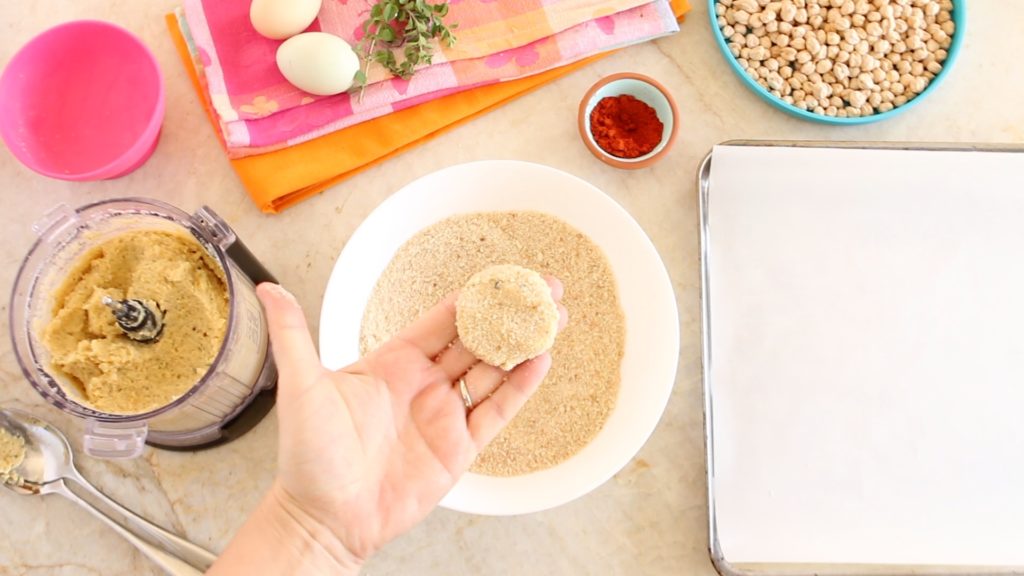
Drizzle some olive oil on top and bake in preheated oven to 400F for 10 min. Flip them and keep baking for another 10min for 20 min total. Enjoy!
CANNED OR DRY CHICKPEAS?
Good question! Canned chickpeas are for sure an easy, quick, ready to use solution. I always have some canned chickpeas in my pantry. Which kind? Organic and low salt/no salt added. Those are the ones I recommend for babies and kids. Some canned chickpeas have too much sodium inside, too much for adults too. Compare the sodium levels on the label of the can so you will know which brand to buy the following time and save time!
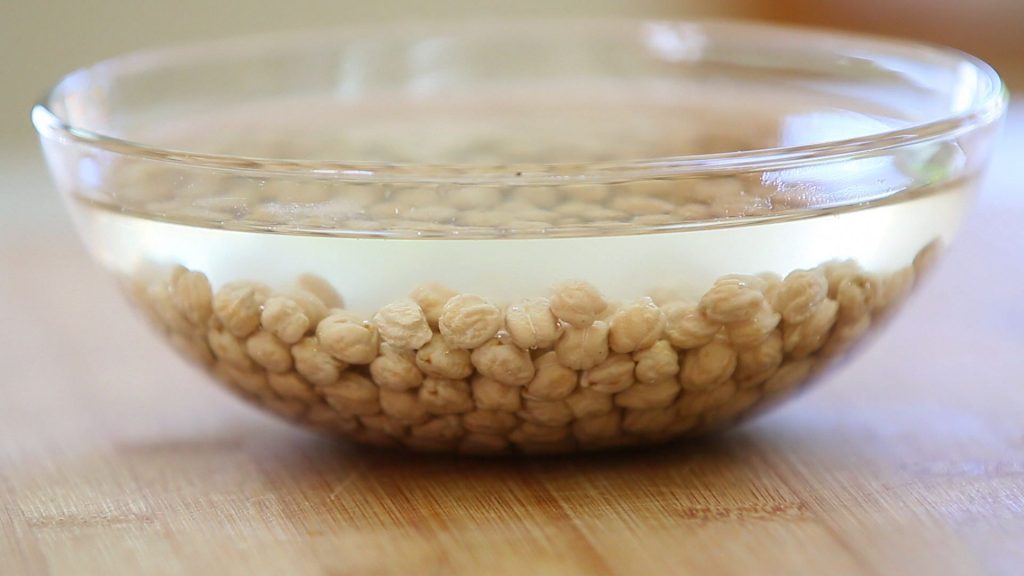
If canned chickpeas are a time saver and easy shortcut for the recipe, dry chickpeas are at another level of taste: way creamier, richer, fuller, tastier, nuttier. They also cost less and you can TOTALLY control the salt amount you add.
They require indeed some planning. You will need to soak them in a bowl of water overnight. The following morning drain them and gently simmer in a large pot with water and salt for about one hour, one hour and half, up until tender. As you can see it’s not a complicate process, it just takes time.
What to do? Do both! Keep both canned and dried chickpeas in your pantry and use one or the other pending how much time you have.
CAN I FREEZE THE CHICKPEA NUGGETS?
Oh yes, this recipe freezes very well. I prefer to freeze the nuggets BEFORE baking them. I place them on a small tray and freeze for few hours. When they are firm I place them in a freezer bag to save space in the freezer. To reheat, I bake them in the oven, directly from the freezer, just adding 5 more minutes tot he total baking time. You can also freeze them once baked. To reheat them you can use the oven to 250F for 10 min or the microwave for 1-2 minutes or the toaster for 2 minuets or the air fryer for 4 minutes. The chickpea nuggets will last in the freezer for up to 4 months.
CAN I SKIP THE EGG?
Yes, you can substitute the egg with 1 Tbsp flaxseed meal mixed with 3 Tbsp water OR 1 Tbsp chia seeds mixed with 3 Tbsp water. The egg has a binding role in this recipe.
CAN I ADD VEGGIES?
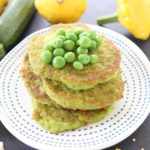
Double yess! I shared with you the basic recipe of the chickpea croquettes, but you can add vegetables too. I would suggest to add 1 grated zucchini, extra water squeezed out OR 1/2 cup frozen peas OR for a sweeter touch 1/2 cup grated carrots. You can also substitute regular potatoes with sweet potatoes.
MORE IRON BOOSTING RECIPES?
If you want to increase your kids’ iron intake, check out these other iron boosting recipes:
- Turkey Squash Red Potato baby puree’ +6M Iron boosting
- Spinach Pear Oat Baby Puffs +6M Gluten Free
- Quinoa Salmon Pea Broccoli Baked Balls +9M
- Quinoa Broccoli Meatballs EggFree / Dairy Free / Gluten Free +9M
- Green Iron Boosting Smoothie
- Pink Iron Boosting Smoothie +6M
- Carrot Apple Oatmeal +6M
- Sweet Potato Fries with Avocado Aioli
- Salmon Bok Choy Plum Baby Puree +6M
- Lentil Veggie Almond Tots – gluten and egg free
- Blueberry Chickpea Vegan Muffins +9M
- Salmon Broccoli Lemon Baby Puree’ +9M
- Lentil Broccoli Soup Recipe +10M
- Turkey Veggie Meatballs in Marinara Sauce – Egg Free
- Spinach Almond Waffles – Gluten and Grain Free +6M

If you give these chickpea nuggets a go, be sure to tag me on Instagram (@buonapappa) so I can see your creations, and leave your feedback in the comments below together with a star rating.
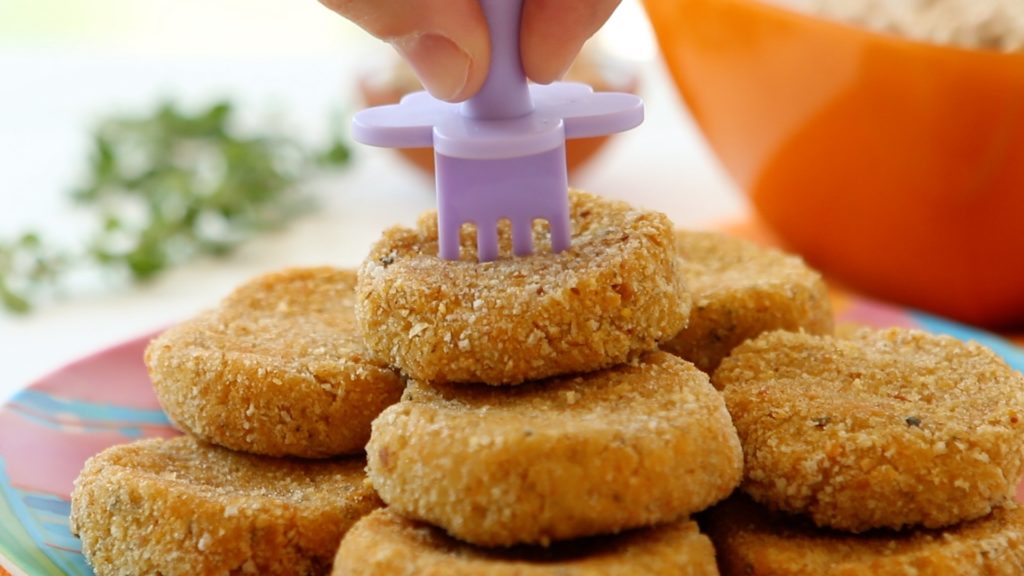
Also, the lovely baby fork that you see in the video and pictures is from Grabease, a trusted baby and eco friendly brand.

- 1 can organic chickpeas, low sodium
- 7 oz potatoes (3 small)
- 1 slice toast bread
- 3 Tbsp breadcrumbs
- 1 medium egg
- 3/4 cups Parmesan cheese, grated
- 1/2 tsp sea salt
- 1 Tbsp fresh thyme, minced
- 3 Tbsp olive oil
- 1 1/2 cup breadcrumbs
- 2 Tbsp Parmesan cheese, grated
- 1 tsp sweet paprika
-
Peel and chop the potatoes in small pieces. Boil them for 15-20 min up until tender. Drain and let cool down few minutes.
-
Drain the chickpeas and rinse them well. Set aside.
-
In a food processor add all the ingredients: chickpeas, potatoes, bread, breadcrumbs, egg, parmesan cheese, thyme, salt and blend up until obtaining a thick smooth paste.
-
In a large bowl mix 1.5 cups breadcrumbs with the parmesan and the paprika. Place 1 tablespoon of chickpea mix in the breadcrumbs mix and coat it all around. With your hands shape it like an oval nugget, a round croquette or a cylindric tot.
-
Line the nuggets on a baking sheet lined with parchment paper, drizzle some olive oil on top and bake in preheated oven to 400F for 10 min. Flip them and keep baking for another 10min for 20 min total. Enjoy!
More from my site
 Spinacine. Italian chicken and spinach croquettes. Kids will love them!
- Healthy & Easy Chickpeas Zucchini Pesto Pasta – One family, one recipe.
- Chickpeas Potato Curry Soup +9M Vegan – Baby Food & Spices
- Blueberry Chickpea Vegan Muffins +9M
- Quinoa Salmon Pea Broccoli Baked Balls +9M
- Tofu Zucchini Peas Millet Fritters +8M
- Beet Chickpeas Rainbow Chard Nectarine Baby Puree +9M
- Chickpea Pancakes recipe – dairy and gluten free


5 Comments
Did you make this recipe? Share the love, tag @buonapappa on Instagram and hashtag it #buonapappa I would love to see your creations!
Crispy and Simple Golden Chickpea Nuggets. Meatless + Iron Boosting – MySpecialFood.com
May 21, 2021 at 12:22 am[…] post Crispy and Simple Golden Chickpea Nuggets. Meatless + Iron Boosting first appeared on Buona Pappa. Source: Crispy and Simple Golden Chickpea Nuggets. Meatless + Iron […]
Maggie
June 29, 2021 at 2:42 amHi, if I’m using dried chickpeas instead of canned how much should I measure?
Barbara Lamperti
December 28, 2021 at 1:38 amHi! The conversion is usually 1/2 cup dried chickpeas for 1 can. Ciao! B
Jackie
October 30, 2023 at 5:48 pmLove the creativity here but this recipe makes a huge mess in the kitchen! trying to coat a paste with breadcrumbs was torture.
Barbara Lamperti
October 30, 2023 at 9:08 pmHi Jackie, thank you for sharing your experience! Yep, breading can get messy. Did you try using a larger shallow bowl for the breadcrumbs and placing it on a baking sheet? The baking sheet keeps the breadcrumbs messiness a bit more contained. Ciao! B